Flowers for pots and planters in your Container Garden
Nothing says summer like pots and planters filled with lush foliage and beautiful blooms. Create your own colorful container gardens with bounty of easy annuals and bulbs and dependable long perennials.
 Choosing a Container for you Container Garden
Container possibilities are endless. You can buy commercially made plastic or clay containers or make you own. You can make your own out of old barrels, wash tubs or even buckets bought from your local hardware store.
Solid containers such as plastic pots hold water longer than horse clay. Plastics are great if your summer tends to be hot and dry since you'll have to water left often. But, if you live in a wet climate or if you tend to overwater porous pots are probably your best bet.
Plastic pots are lighter making them easier to move. However, they are more prone to blowing over, but clay pots are heavy and less likely to blow over.
Clay often crack when they do tip. Dark pots heat up in the bright sun and dry out quickly, avoid black plastic pots for container gardens that are growing in full sun.
Caring for annuals and perennials and containers

Pots or baskets that are about eight inches deep can usually hold enough soil for good growth without getting too heavy. If you don't plan to move the planner it can be as big as you want.
Containers as large as half barrels will give you ample planting space for a wide variety of flowers.
Planting Your Annuals and Perennials
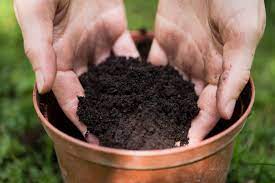
You should fill your containers with an all purpose container mix purchase from your local nursery. Your garden center or when that you made yourself. You need to choose a growing medium that will hold some water but not too much.
Straight garden soul isn't a good choice but you can improve it by mixing 2 part soil with one part finished compost or peat moss and 1 part pearl light. Commercial container mixes are easy to use and they can support a variety of different plants.
Watering your container garden plants

Very small pots small and medium sized Clayton tanners and hanging baskets dry out quicker. You may have to water this as often as twice a day.
If a pot or basket dries out completely you still may may be able to save the plants set the Potted basket in a large container filled with water let it sit there for an hour or 2 and then set the pot or basket in a shady spot for a few hours until the plant perks up again.
Then move the pot or basket back to its original spot. Be extra careful to keep the plants well watered from then on.
Fertilizing your container plants
If you want your container plants to thrive and reach their full potential, fertilizing is an important step to consider. Knowing when to fertilize is key. Generally, it's best to start fertilizing when your plants have established a good root system, usually a few weeks after planting.
Click Organic Fertilizer 101 The Basics for a brief summary of fertilizers.

Now, let's talk about what fertilizers to use. There are different types available, such as organic and synthetic options.
Organic fertilizers, like compost or worm castings, are derived from natural sources and provide a slow release of nutrients.
They're great for long-term plant health. On the other hand, synthetic fertilizers are usually fast-acting and offer precise control over nutrient ratios.
You can find a variety of water-soluble fertilizers specifically formulated for container plants. Remember to follow the instructions on the packaging and use the recommended amount to avoid over-fertilizing.
Frequency matters when it comes to fertilizing container plants. As a general rule, it's better to under-fertilize than over-fertilize, as excess nutrients can harm your plants.

Some varieties may require more frequent fertilization, while others may need less.
Keep an eye on your plants' growth and overall health to determine if adjustments to the fertilizing schedule are necessary.
Finally, let's discuss the signs of over-fertilization. Although providing nutrients is important, too much of a good thing can be harmful to your plants.
If you notice excessive foliage growth but limited flower or fruit production, it could be a sign of over-fertilization. Yellowing or browning of the leaves, especially at the tips, can also indicate nutrient burn.
Additionally, if the soil becomes excessively salty or if you see a white crust on the surface, it may be due to an accumulation of fertilizer salts. If you suspect over-fertilization, it's best to flush the soil with water to remove the excess nutrients and adjust your fertilizing routine accordingly.
Remember, fertilizing your container plants is a balancing act. With proper timing, choosing the right fertilizer, and being mindful of the signs of over-fertilization, you can provide your plants with the nutrients they need to thrive and keep them looking their best.
Choosing Annuals For Your Container Garden

Well, for starters, annuals have a relatively short life cycle, which means they bloom quickly and provide an explosion of color throughout the summer.
They come in a wide variety of shapes, sizes, and colors, allowing you to create stunning combinations in your containers. Additionally, many annuals are known for their ability to continuously produce flowers, ensuring a long-lasting display of beauty.
Sun or Shade for Annuals?
Now, let's talk about whether annuals prefer sun or shade. The great thing about annuals is their versatility in terms of light requirements.
Some annuals, like petunias and marigolds, thrive in full sun. They need at least six hours of direct sunlight per day to grow and bloom to their full potential.
On the other hand, there are annuals, such as impatiens and begonias, that prefer shade or partial shade. These varieties are perfect for brightening up those shady spots in your container garden.
Before choosing your annuals, consider the lighting conditions of the area where you plan to place your containers to ensure the best match.
When to Buy Annuals and Where

Buying annuals during this time ensures that they can be planted directly into your containers without the risk of cold damage. As for the best places to buy plants, you have a few options.
Local nurseries and garden centers are great choices as they offer a wide selection of healthy and well-cared-for plants.
You can also check out farmers' markets or even online plant retailers for convenience and a diverse range of options.
Selecting annuals for your container garden is an exciting endeavor. Their quick bloom time, stunning colors, and continuous flowering make them ideal candidates for containers.
Remember to consider the lighting conditions of your garden area when choosing annuals, as some prefer full sun while others thrive in shade.
Timing is key when buying annual plants, so aim for late spring or early summer when the risk of frost has passed. Whether you visit local nurseries, garden centers, farmers' markets, or explore online options, you're sure to find a wonderful selection of annuals to bring life and vibrancy to your container garden.
Growing Perennials In Containers

So, why do perennials make good plants for containers?
Well, unlike annuals that complete their life cycle in one season, perennials come back year after year, providing a consistent display of beauty.
They offer a wide range of colors, textures, and heights, allowing you to create a diverse and visually appealing container garden. With proper care, perennials can thrive and bring joy to your outdoor space for many seasons to come.
Caring for Perennials
The differences in care between perennials and annuals. One key difference lies in their life cycle. While annuals have a short lifespan, perennials have a longer lifespan and can become established in their containers over time.
This means that perennials require less frequent replanting compared to annuals. Additionally, perennials often have deeper root systems and may require larger containers to accommodate their growth.
It's important to choose containers with good drainage to prevent root rot and ensure the long-term health of your perennial plants.
Soil For Perennials
This type of soil allows excess water to escape, preventing waterlogged conditions that can harm the roots. Adequate watering is also important.
While perennials generally require less frequent watering than annuals, it's important to keep the soil evenly moist, especially during hot and dry periods.
Regularly check the moisture level by sticking your finger about an inch into the soil. If it feels dry, it's time to water.
Fertilization of Perennials in Containers
Another crucial aspect of caring for perennials in containers is fertilization. Unlike annuals that benefit from regular feeding, perennials typically have lower nutrient requirements.
Applying a slow-release fertilizer in the spring can provide a steady supply of nutrients throughout the growing season.
Additionally, you can supplement with a water-soluble fertilizer every four to six weeks during the active growing period. Always follow the instructions on the fertilizer packaging to avoid over-fertilization, as excessive nutrients can be harmful to the plants.
Maintenance of Perennials in Containers
Pruning may be necessary to control growth and shape the plants. Perennials may also benefit from dividing every few years to prevent overcrowding in the container.
Regularly monitor your plants for pests and diseases, and take appropriate measures if any issues arise. By providing proper care, including soil, water, fertilization, and maintenance, your perennial container garden will flourish and bring beauty to your outdoor space for years to come.
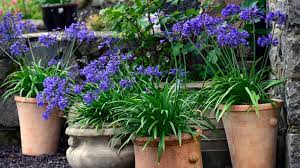
Bulbs For Container Gardens

They come in a wide array of varieties, from tulips to daffodils and lilies, offering a plethora of colors, shapes, and sizes. With proper care, bulbs can provide a burst of color and joy in your container garden.
Caring for container bulbs
Caring for container bulbs throughout the seasons is essential to ensure their health and longevity. In the spring, when the bulbs are in bloom, it's important to provide adequate water to keep the soil evenly moist. Once the flowers fade, resist the urge to remove the foliage immediately.
Instead, allow the leaves to wither and turn yellow naturally. This process allows the bulb to store energy for the following year's growth.
During the summer, when the bulbs are in their dormant phase, reduce watering and allow the soil to dry out slightly between waterings.
In the fall, you can prepare for the next growing season by removing any dead foliage and replenishing the soil with a layer of compost or well-balanced fertilizer.
Choosing The Right Containers For Bulbs

Additionally, consider the depth of the container. Most bulbs require a planting depth that is two to three times their height.
Therefore, select containers that are deep enough to accommodate the specific bulbs you intend to grow. You can choose from a variety of materials such as clay, plastic, or wooden containers, depending on your preferences and the overall aesthetic of your garden.
When to plant bulbs in containers depends on the specific type of bulb and the climate in your region. In general, bulbs are planted in the fall before the first frost. This allows them to establish roots and go through the dormant period over winter.
However, some bulbs, such as amaryllis, can be planted in late winter or early spring for a summer bloom. It's important to check the specific planting guidelines for the bulbs you choose, as different varieties may have slightly different requirements.
You can plant bulbs in containers with other plants! In fact, combining bulbs with other plants can create beautiful and dynamic container arrangements. When selecting companion plants for your bulbs, consider their light and water requirements.
Choose plants that have similar needs to ensure harmonious growth. For example, you can pair bulbs with annuals or perennials that have similar light and water preferences. Be mindful of the size and growth habits of the companion plants to ensure they won't overshadow or crowd the bulbs.
With thoughtful planning, you can create stunning container combinations that incorporate the beauty of bulbs alongside other plants.
With these tips in mind, you're ready to embark on your bulb-filled container gardening adventure. Enjoy the process of nurturing these remarkable underground treasures and watching them bloom into breathtaking displays of nature's wonders.
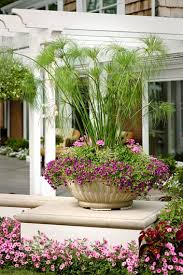
Ornamental Grasses For Containers

Whether you prefer tall and dramatic grasses or compact and fine-textured ones, ornamental grasses can provide a stunning focal point or complement other plants in your container garden.
Caring for Grasses in Containers
Water the grasses deeply but infrequently, allowing the top inch or two of soil to dry out before watering again. Keep in mind that grasses in containers may require more frequent watering compared to those planted in the ground.
Regularly check the moisture level by inserting your finger into the soil, and adjust your watering schedule accordingly.
Ornamental grasses need a decent amount of sunlight to thrive, so place your containers in a location that receives at least six hours of direct sunlight per day. If you're growing grasses that prefer partial shade, ensure they receive the appropriate amount of light as indicated by the specific variety.
Different seasons and Ornamental Grasses

However, be mindful not to over-fertilize, as excessive nitrogen can result in weak growth or floppy stems.
When it comes to preparing ornamental grasses for winter or harsh weather, a few simple steps can help ensure their survival and healthy regrowth in the following season.
In late fall, before the first frost, cut back the grasses to a few inches above the ground.
This helps prevent wind damage and keeps the container looking tidy. If you live in an area with severe winters, you can consider insulating the containers by wrapping them with burlap or placing them in a protected area, such as a garage or shed.
Alternatively, you can move the containers to a spot with better winter conditions, such as a covered porch.
Mulching around the base of the grasses with a layer of straw or shredded leaves can also provide some insulation and protection from freezing temperatures.
Remember that not all grasses are fully hardy in all climates, so it's essential to choose varieties that are suitable for your region. If you're unsure about the hardiness of a specific grass, consult with your local garden center or do some research to ensure the grass can withstand the winter temperatures in your area.
By taking these steps to care for and protect your ornamental grasses during winter or harsh weather, you can help them survive and thrive, allowing you to enjoy their beauty and texture year after year.
video brought to you by American Meadows


